Saturday, 14 February 2015

Dissent in the ranks - Wrath of Sigismund Part 1

Game 3 of out little side campaign set in the Heresy was played out recently. If you have no idea what is going on, here are some links to the other battles that have taken place.

Dissent in the ranks - A Heresy Era Battle Part 1 

Dissent in the ranks - A Heresy Era Battle Part 2

Dissent in the ranks - Supply grab Heresy Battle part 1

Dissent in the ranks - Supply grab Heresy Battle part 2


Essentially it is a series of games set in an alternative 30k timeline, between the forces of Sigismund and Alexis Polux.  This game marked game 3 of our mini-campaign, pitting the torn forces of the Imperial Fists Legion and set at 2000 pts. 

Here are the lists. 
Sigismund's Force (2000pts)

Sigismund                                                                                                                         

Chaplain Akrida                                                                
Crossius Arcanum
Artificer Armour                                                              
Refractor Field                                                                  
Melta-Bombs                                                                   
                                                                                                                                               
Legion Terminator Squad (Cataphractii)                                            
Storm Shields                                                                    
3 Thunder Hammers                                                       
                                                                                                                                           
Spartan Assault Tank                                                                
Armoured Ceramite                                                      
Flare Shield                                                                         
                                                                                                                                               
Legion Tactical Squad (I)                                                
Powerfist                                                                            
                                                                                                                                               
--> Rhino                                                                             
--> Extra Armour                                                              
                                                                                                                                               
Legion Tactical Squad (II)                                              
Powersword                                                                      
                                                                                                                                               
--> Rhino                                                                             
--> Extra Armour                                                              
                                                                                                                                               
Legion Heavy Support Squad                                      
6 Missile Launchers                                                         
Scanner                                                                                                
+ 2 Marines                                                                        
                                                                                                                                               
Land Raider Proteus                                                       
-Armoured Ceramite                                                      
                                                                                                                                               
Land Raider Proteus                                                       
-Armoured Ceramite                                                      
                                                                                                                                               

Secessionist Forces

Legion Praetor
Digilasers
Solarite Power Gauntlet
Consul Master of the Fleet
Consul Librarian in Terminator Armour
Contemptor Dreadnought 
Multimelta, Dreadnought Close combat weapon
Contemptor Dreadnought 
Multimelta, Dreadnought Close combat weapon
Contemptor Dreadnought
2 Chainfists, 2 melta guns, Chassis Havoc Launcher
Legion Dreanought
Twin-linked Lascannon, Dreadnought Close combat weapon
Legion Veteran Squad (I)
(sniper special rule)
Legion Veteran Squad (II)
Heavy Bolter, Meltagun
Legion Veteran squad (III)
Unknown

Heavy Support Squad
5 Plasma Cannons

The Mission
The mission for this game was blissfully simple. Kill them all, and try not to get wiped out too bad in the process. Sigismund, having well and truly enough of this Heresy in the ranks, seeks to expunge and wipe out all enemy forces. No mercy. With his mission set, the tanks lined up ready for battle (I lost the roll for deployment), only to be fired upon by the Secessionist forces lying in wait! (My friend also stole the initiative).
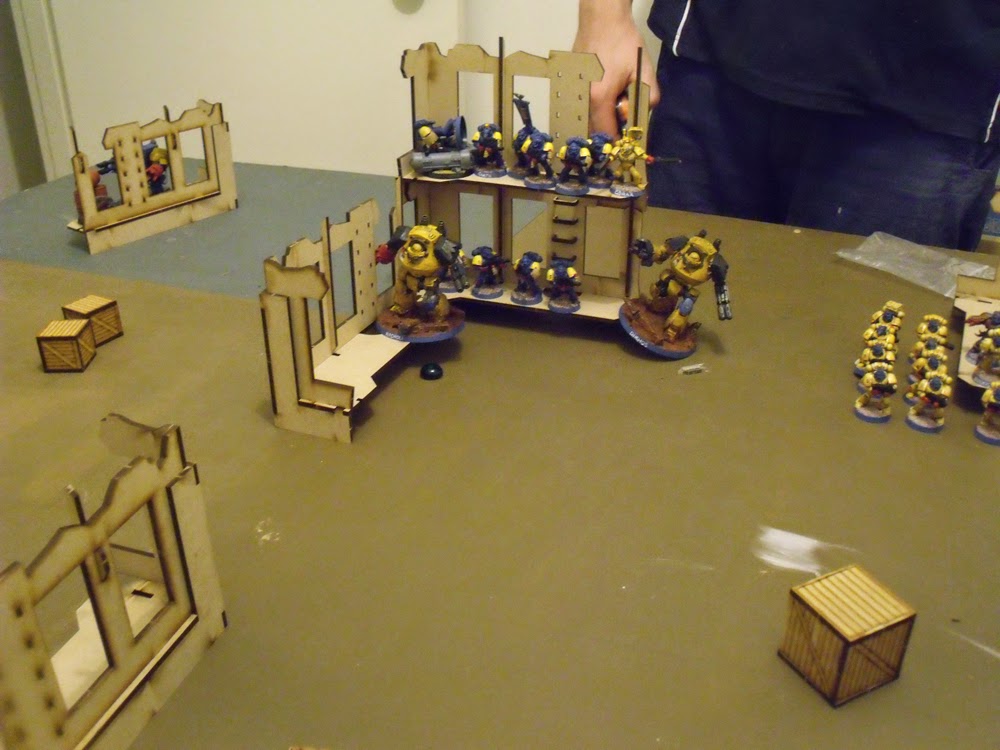
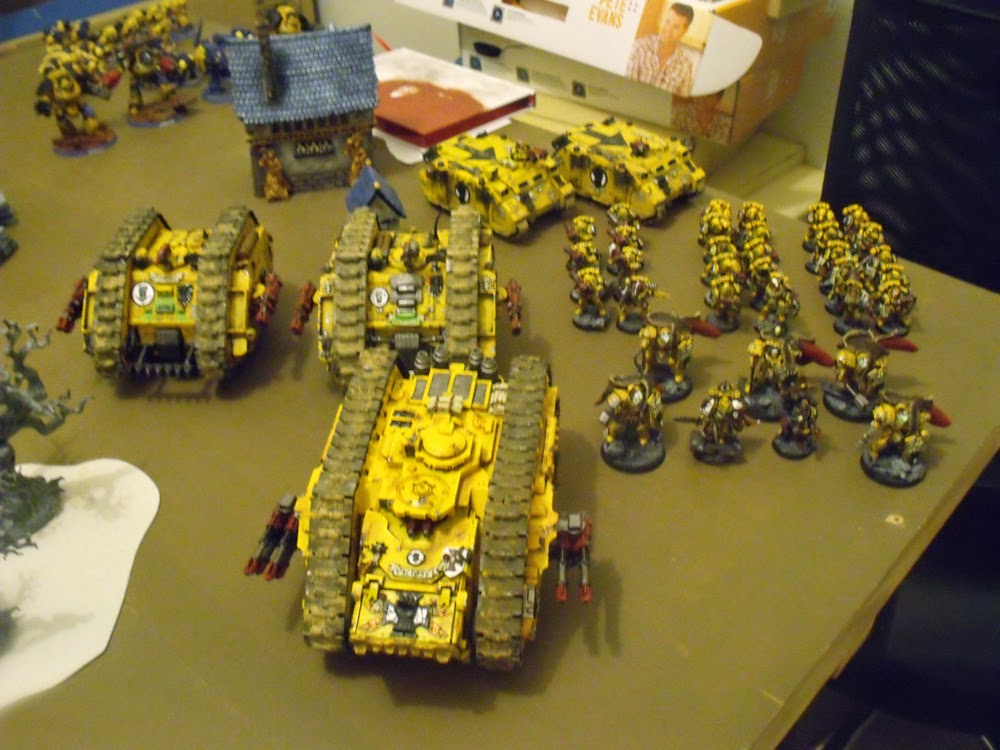
Imperial forces all deployed together in an armoured gauntlet.
The Secessionist forces split their forces in two, with the Heavy Support squad, Veteran Squad I and the Master of Signals on the bottom left, with the rest of the forces deployed on the upper side of the table.
The scene is set!

Secessionist Turn 1
 A devastating blast from the Legion Dreadnought commenced the attack of the traitors. The shot rang true and tactical Squads Rhino I was destroyed, even slaying 4 of the marines inside. The rest of the forces and contemptors moved forward, with a few running in order to close the gaps with the Imperial Forces. The Plasma Heavy Support squad fired upon the Loyalist Missile launchers in the old building, slaying the Sergeant. First blood to the Secessionists!
 
Loyalist Turn 1
With a deep rumble, the armoured might of Sigismund went forward. The Spartan "Victory", went as quick as it could towards the forces on the far left flank, determined to unleash Sigismund and his vengeance upon the forces there. The Land Raider's maneuvered to take aim at the approaching Contemptor's, and the remnants of Tactical Squad I embarked upon the Land Raider "Indomitable".
No shots rang out from the Spartan, as it was focused on speed. The Land Raiders and Missile launchers from the Heavy support Squad unleashed their fury on the approaching contemptor's, destroying one of them and causing some damage to another.
 
Secessionist Turn 2
Swarming over the fallen remains of the contemptor, the Secessionist Forces moved again with all haste toward the Imperial lines, eager to get to grips in short range fire fights.
The Master of Signal's, identifying the approaching Spartan as Sigismund's personal transport, leaves Veteran Squad I, and calls down a barrage onto the Heavy support unit in the building. Another 2 marines fall to the barrage and plasma cannon shots.

Loyalist Turn 2
The Land Raiders and Heavy support squad again unleash their payload against the approaching contemptors, destroying another one and critically damaging another.
The Spartan "Victory" unloads Sigismund, Akrida and the Terminators into the midst of the enemy positions. Sigismund sounds the charge and they crash into Veteran Squad I. All that could be reached were slain, though due to fearless, the two survivors fight on, and Sigismund and his squad close with the last members of the squad.

Secessionist Turn 3
The Master of Signals sees the carnage unleashed by Sigismund and his unit, and decides to relocate to other ground. The rest of their forces again move forward. The Legion Dreadnought successfully causes some damage to the Land Raider "Indomitable" though a glancing hit.

In the assault, Sigismund finishes off the last two members of Veteran Squad I, and the unit then consolidates towards the Spartan "Victory".

Loyalist Turn 3
Sigismund and the Terminators embark on the Spartan "Victory", leaving Akrida to deal with the last Plasma cannon marine. The Spartan then goes on the shoot the 'relocating' Master of Signals, killing him outright. The Land Raiders and the Heavy Support Squad fire again on the last contemptor and Legion Dreadnought, destroying both.
Akrida charges into assault and finishes off the last Plasma Cannon marine from the Heavy Support Squad. 

That marks the half way game. I will endeavour to get the last part up soon enough.

Thanks for looking!

Cheers!

Saturday, 31 January 2015

Sigismund's Ride update 2

Just a quick update in the Spartan, which will be Sigismund's transport (hopefully) in future games. I tried to put more Black Templar iconography on it to symbolise who's personal tank it is.


I also added the Forge World Land Raider doors as well, to keep it in alignment with the Legion. I still have to do the sponsons, which I am planning to make and prime black, as I think that would save time.

Just have the otherside and the tracks. Made a big mistake with the tracks though, wish I kept them off and primed/painted them and then stuck them on. As is they are a real pain. But these are the things you learn.

Thanks for looking.

Cheers!

Sunday, 18 January 2015

Dissent in the Ranks - Supply grab Heresy Battle part 2

Here is the second part of the Supply grab mission fought against the Traitor Fists. If you missed the first part, you can find it here. This game was 1500pts, and was an objective grab mission. We had 4 objectives on the board. and we had the usual secondary objectives. In addition, every Heavy support Choice wiped out was worth an extra victory point.

So here we go!

Secessionist Turn 4
The enemy Praetor sees the Land Raider "Dauntless" and decides to go for it, and orders his squad up to assault the vehicle. There is no other movement, and shooting is ineffective.
The enemy Warlord pounds against the hull, but ultimately the stallwart armour holds fast and no damage is sustained.

Loyalist Turn 4

The Land Raider "Indomitable" deposits the lascannon squad on the left objective, and draws a bead on the veteran squad. The Rhino carrying Tactical squad I sneaks up towards the objective held by the Legion Dreadnought on the far left of the field. Sigismund disembarks and joins the Tactical squad II, and the Land Raider "Dauntless" gets ready to fire. Sigismund sees his target and declares to his troops that that one is his!
...and then the Land Raiders vaporize the Warlord. The veteran squad sustains a few causalities. Sigismund seethes at his missed chance of honourable combat.

Secessionist Turn 5
The veteran squad wet their blades on the blood of the Missile Heavy Support squad. The Dreadnought takes a shot at the Rhino, but again hits the terrain.

Loyalist Turn 5
Sigismund launches into assault with the veteran squad and issues his challenge. The Sgt steps forward and is hacked down along with the rest of the unit, leaving the tactical squad to simply watch in awe. The land Raiders move up and take some shots at the Legion Dreadnought, and manage to do some light damage to it.

Final Turn 6
The Secessionist last turn is uneventful, with the Legion dreadnought Immobilized and stunned, its shot misses the mark. The Veteran Sniper squad is out of range of any targets, and simply secures their objective.

The Loyalists move towards the last sections of resistance. Sigismund and the Land Raider "Dauntless" claim the objective in the right field. Tactical squad I disembarks in front of the objective held by the Legion Dreadnought. Shooting is ineffective, with the Heavy Weapon shots unable to make a lasting mark on the last Legion Dreadnought.
 However, left on 1 hullpoint left, Tactical squad I throws a krak grenade, that takes down the engine of war.

So that is game! The end results are:

Loyalist: 12
Secessionist: 4

A loyalist victory! Again, Sigismund wasn't able to get into combat with the enemy Warlord, and again due to my shooting. Hopefully Sigismund will get his mark in the next game. The next game will be 2000pts, so it should be interesting.

Thanks for looking.

Cheers!


Saturday, 17 January 2015

Dissent in the ranks - Supply grab Heresy Battle part 1

This is the second battle of the Imperial Fists civil war in this unique Heresy Era setting. You can find the first battle here and here. These games represent the conflicting ideologies of Sigismund and Alexus Polux. Sigismund fights for the Emperor and expects all Imperial Fists to do so, whereas Alexus Polux wants the Imperial Fists to cede from the Emperor and join the Successionists. These battles represent who the Imperial Fists will mainly fight for. Dorn, at this stage has made no move on his own Legion, or any indication who he supports, but he won't stay idle for long.

This game was 1500pts, and was an objective grab mission. We had 4 objectives on the board. and we had the usual secondary objectives. In addition, every Heavy support Choice wiped out was worth an extra victory point, which did make me chuckle a little considering I had 4 extra victory points to give up.

Here are the resplendent forces of Sigismund.


Sigismund                                                                                                                       

Legion Tactical Squad (I)                                                
Powerfist                                                                            
Legion vexila                                                                                                             
--> Rhino                                                                          
--> Extra Armour                                                          
                                                                                                                                              

Legion Tactical Squad (II)                                            
Powersword                                                                     
                                                                                                                                              
--> Rhino                                                                             
--> Extra Armour                                                            
                                                                                                                                             

Legion Heavy Support Squad                                      
4 Missile Launchers                                                         
1 Extra Marine                                                             
Augury Scanner                                                                                             
                                                                                                                                               
Legion Heavy Support Squad                                     
4 Lascannons                                                                    
2 Extra Marines                                                                
Augury Scanner                                                                                               
                                                                                                                                             
Land Raider Proteus                                                                                                      
Land Raider Proteus                                                                                                       


Secessionist Forces


Legion Praetor
Digilasers
Solarite Power Gauntlet
Consul Master of the Fleet

Contemptor Dreadnought 
Multimelta, Dreadnought Close combat weapon
Contemptor Dreadnought 
Multimelta, Dreadnought Close combat weapon
Contemptor Dreadnought
2 Chainfists, 2 melta guns, Chassis Havoc Launcher
Legion Dreanought
Twin-linked Lascannon, Dreadnought Close combat weapon
Legion Veteran Squad (I)
(sniper special rule)
Legion Veteran Squad (II)
Heavy Bolter, Meltagun

Game
So we had an objective grab game, where Heavy Support choices, if wiped out or fleeing, were worth an extra VP. As you can see from my list, I had 4 additional VP points I could give up. However these supplies were very important to capture, as they contained not only extra ammunition and powercells, but fuel. Sigismund needed to deny the traitor Fists these resources and capture them for himself, in order to maintain and keep his armour running.

 Secessionist Forces deploy to capture supplies.
 Sigismund and his armour deployment.
The scene is set. I fail to sieze the initiative, so the Secessionist Forces get the first turn.

Secessionist Forces Turn 1
 
The Contemptor Talon crashes through the building in front of them, heading towards the Loyalist forces. The one on the far right however gets caught in falling masonry and is immobilized. The Legion Dreadnought takes a shot at Rhino I, but hits a wall instead. The veterans move up, towards the Imperial lines, with the sniper squad (blue) taking possession of the ruined building and the objective.
Loyalist Turn 1
The Land Raiders move to line up shots on the approaching Contemptors, hoping to knock them out before their Multi-meltas can get into optimal range. Rhino II moves out of the way of the Lascannon Heavy Support squad, and attempts to give some cover to the Missile Launcher squad from the approaching veterans.
The hail of lascannons and missiles claim the middle Contemptor and some light damage is sustained by the leading contemptor. First blood is claimed by the loyalists!
 
Secessionist Forces Turn 2


The lead Contemptor continues its advance though the ruins and takes a shot at Rhino II. The Rhino suffers an immobilized result and suffers a hull point of damage. The Venteran squad II (yellow), move up trying to close the distance to the heavy support squads. The Master of Signal calls down a terrifying strike on the Lascannon squad in the open. His aim scattered little, and 3 marines were taken out by the strike. The Land Raider "Indomitable" shrugged off the effects of the blast.

Loyalist Turn 2
The Land Raiders again adjust their aim at the lead Contemptor and manage to take it down. The remaining heavy Weapon shots fire at the last immobilized Contemptor and manage to inflict heavy damage on its frame, but it fights on. The crew of Rhino II desperately try to restart the engine, but to no avail.


Secessionist Forces Turn 3

The traitor forces fire at the stranded Rhino II, and manage to wreck the noble vehicle. The Tactical squad II, disembark ready for orders.


Loyalist Turn 3
The lascannon heavy support squad embarks on the Land Raider "Indomitable", and it proceeds to move them to the objective on the left side of the table in the ruins. Sigismund, with the enemy Warlord identified, instructs the "Dauntless" to move towards them. Tactical squad II is ordered to meet up with Sigismund for the assault on the Warlord. The Heavy Weapons and Land Raiders fire shots at the veteran sniper squad hunkered on their objective, but the cover is too good, and only a couple fall.

So draws an end to part 1 of the battle. Will the Loyalists continue their lucky streak? Will Sigismund finally get to take down the enemy Warlord in honourable combat? Stay tuned and we shall see!

Thanks for looking.

Cheers!

Thursday, 15 January 2015

Sigismund's Ride

I decided I wanted a ride for Sigismund, to go along with my old Rogue Trader Land Raiders. I always seem to play wysiwyg, so I needed an assault vehicle for him to launch out of. It seemed the Spartan was the appropriate tank for this task.

Anyways, it got delivered yesterday, and in a span of an hour, it washed it up and dried it, and started to clean the kit. Being the responsible parent that I am, I chucked on a movie to distract my progeny, and got to cleaning. When I got back to the kit at night, after the boys went down, I started to paint up the interior. This is where I managed to get with the kit last night.

Hope you like!


I am well aware that the interior is hardly ever going to be seen, especially the ceiling, but since I have done it with all the other transports (Rhinos/Razorbacks), I had to do it with this.

My next step, is painting the side tracks before i glue it to the main hull. And doing the tracks were a real pain, though not as much as the Fellblade.

Let me know what you think.

Thanks for looking.

Cheers!

Wednesday, 14 January 2015

Xenos vs Xenos: Orks vs Tyranids Battle report.

I say this is a battle report in the loosest sense of the word. This was a game (1000pts) between my friends new Tyranid army he was fielding, and my Freebooter Orks army. I believe the mission was purge the Xenos, which was rather fitting as we were both Xenos players.

For this game, I had only just got to grips with the new Ork codex, and essentially this would be our first times playing each of these armies. So which Xenos will reign supreme?
 

This was the Tyranids deployment. I'm sure most people will be able to see what is there. There is also a flying Hive Tyrant with double twin-linked devourers just behind that building.
 My meagre force consisted of a Warboss in Mega armour and a lucky stick. 4 Mega-armoured Nobz keeping him company in the Battlewagon, alongside a Painboy. I also have 2 units of shoota boyz with a few big shootaz there and a unit of Tankbustaz in a trukk. I also have a unit of 10 grots hiding at the back in an effort to be forgotten (I took them for objective purposes).
 The stage is set!

Tyranid Turn 1
I had the choice of first or second turn. For some reason I decided to go second. Don't ask me why. Basically the Tyranids shot over half my army off the board. The Shoota boyz on the left legged it off the board from casualties. The Shoota boyz bunking down in the building lost 15 boyz to the spore mines. The trukk got shot and got wrecked and the tankbustaz got shot at as well. Well and truly a nasty turn 1.

Freebooter Turn 1
My turn 1 sees the Battlewagon move up, and the Warboss and his unit of mega-armoured Nobz leap out and assault the big nasty thing in the river. They promptly swat it to death with Powerklaws and consolidate as close as they can to the Tyranids. The tankbustaz make loud noises at the Flying Hive Tyrant and that's pretty much the extent of my turn.

Tyranid Turn 2
The Tyranids move up for more firing positions. They shoot my Nobz with everything, and eventually I failed a morale test and they fall back. The Hive Tyrant shoots more death at the Shoota boyz in the building.

Freebooter Turn 2
My Mega-armoured Nobz and Warboss fail their regroup check and continue to leg it. The tankbustaz try and get some cover.

Tyranid Turn 3
The guants shoot and assualt my Nobz and Warboss, along with a lot of other shooting. The Nobz are wiped out but the Warboss survives on 1 wound, along with the Painboy. The Hive Tyrant finishes off the Battlewagon and the Grots are wiped out by indirect shooting. In the assault, the Warboss does his best to fail his saves and succeeds. Just the Painboy remains.

Freebooter Turn 3
The Tankbustaz move up to assault the gaunts to help out the painboy and promptly roll a double 1 for assult. The painboy survives the assult, and kills a guant.

Tyranid Turn 4
Not much happens here. The painboy goes down to the gaunts on the assault finally succumbing to the pain.

End result:

Tyranids: 12
Orks: 1

A very sound thrashing! I totally blame it on the dice and the fact that my army (aside form 2 models) was completely unpainted. So was his but there you go, I have no real excuse. I look at the game again and honestly can't think of what I could have done. The Tyranid shooting was just insane, and even my boyz in the buildings copped in insane amount of hits from the biovores (something like 60 hits from them in Turn 1 from the overlapping barrages).

Hopefully next time I can try and redeem myself and make it a little closer!

Thanks for looking.

Cheers!


Thursday, 8 January 2015

A bloody Fist and objective markers

Another quick update here. Finished one of the marines in MKVI armour. Decided that his one had just made a kill and it got rather messy. Usually when I do blood, I grab an old brush, crack open the Tamiya Clear Red and mix a little black into it. Looking through the photo's, perhaps I cold have added a little more black to the Clear Red to get a darker blood. Ahh well.

Anyways here he is in all his (blooded) glory.


I have also been busy working on some objective markers. Since it seems most games use around about 6 objectives and I only have 3 made and painted up. I thought I would finally rectify the problem and assemble another three. 

I got these ages ago. The first 2 are the Space Marine casualties.


You can never have enough ammo and guns.

So that's what I have been up to. Next is some more Imperial Fists, the other 2 MkVI's.

Thanks for looking.

Cheers!